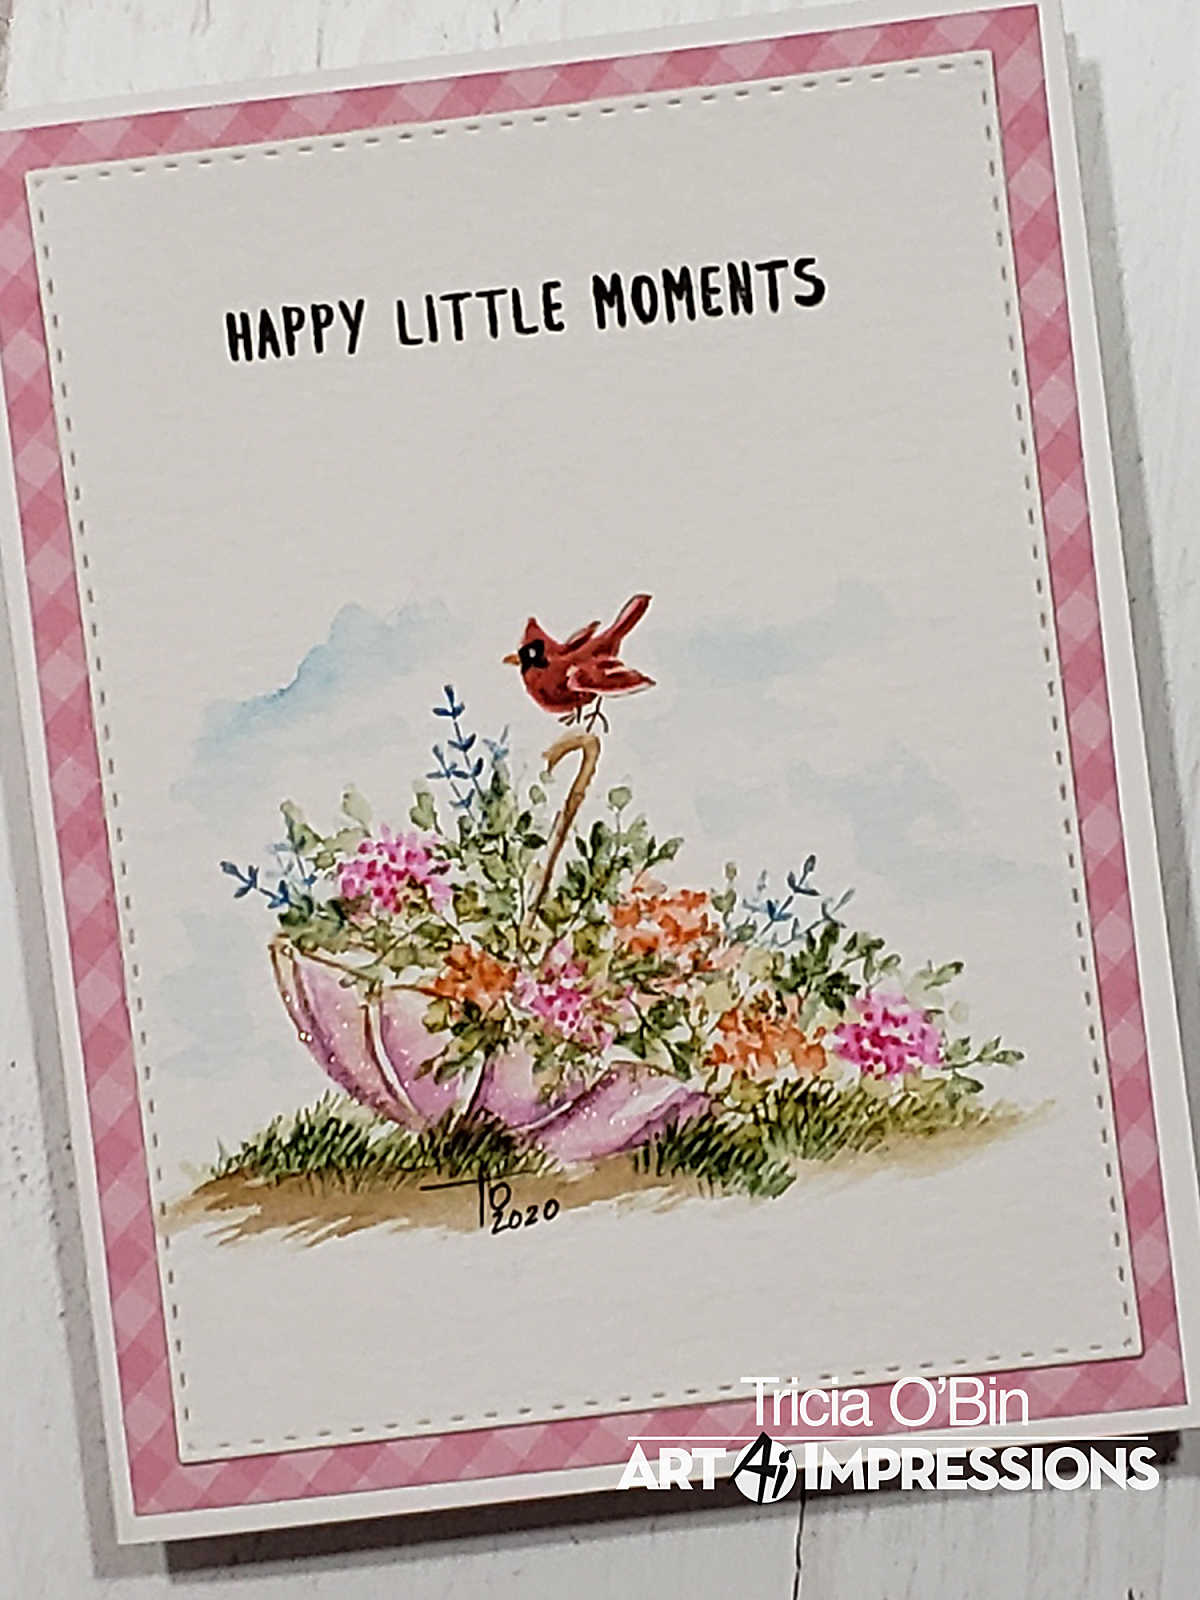
Yay, welcome back to another inspirational Watercolor Weekend! We are so excited you are joining us and we hope you share what you create! This weekend I created this cute Umbrella Planter with the cutest cardinal. Want to learn how I did it? Keep reading…
The Painting
I started off by inking the umbrella from the WC Beach Girls set with 969. I left off the end of the umbrella so I could paint in a rounded handle. In order to make the bouquet fuller, I wiped off the back of the umbrella. I also wiped off the top of the umbrella so it wouldn’t show through the grass making the grass appear thicker. Next, I added some water to the lines to create depth. I added a little 969 to my palette and painted in the handle.
I added some 636 to my palette and painted in the umbrella, being sure to lay down the color where I wanted it darkest and blending it out towards the top. It is very important, as Bonnie and Kendra remind us, leave white space near the tops to your image isn’t flat.
I knew I wanted to have the flowers spilling out onto the ground, so I drew in a pencil line from just below the right side of the umbrella about 2 inches long. By doing this it kept my flowers from going too low.
I started off by stamping in the small vine from the WC Foliage Set 4 in 177 around the bottom (or top depending how you look at it) of the umbrella. I softened them with water.
Next I inked the small hearts from WC Mini Flower Set in 925 and stamped it several times in a circle in 3 different areas. Next I took the small dots from the same set and inked it with 725 and stamped it several times in a circle in 3 different areas. I softened the blooms with water.
Using my vine again, I filled in the bouquet with more leaves to create a fuller bouquet. I softened the lines. I added the small grasses along the ground making sure to stamp up to 5 times in a straight line. I pulled the color out of the lines using a brush stroke (up and out). I painted in some ground using 969 from my palette.
I added some of the decorate twigs (not sure what to call them) inked in 526 (cuz I love this color) and stamped it several times to create some height and interest. You don’t need to add water to these unless you want to (I do because I think it looks more watercolory (is that a word?).
I used my stamp positioner to position the bird on the handle. I inked one of the birds from the WC Large Birdhouse set in 969. I stamped it off so it was not so dark. I added 856 to my palette and built the color up slowly until I was happy with it. It is imperative to leave white highlights. I used my black twin tone marker to draw in his black eye.
Lastly, I used some 526 and a lot of water to create the sky. I tend to go overboard with my sky but I am ok with it. I signed and dated. That’s it!
To make the card
I cut my painting out with my stitched rectangle die. I added it to my MISTI, positioned my Happy Little Moments stamp from WC sentiment 2 set, inked it up with Gina K Designs amalgam ink and stamped it twice along the top.
I cut the mat from Echo Lake Spring Gingham paper (5.25 x 4) and using connect glue added it to a Neenah cardstock card base.
Thank you so much for spending some time with me today. I hope I have inspired you to create something beautiful today. Tag me on Instagram so I can see your awesome creations (@tobin0971).
RELATED: Vintage Flowers | Watercolor Weekend | Art Impressions Stamps


Very pretty, love all the colors
So creative and beautiful!!!
This is beautiful! Thank you for the great detail in your description of steps. For a beginner like me, it really helps.
This is beautiful! I love how you used the umbrella and filled with flowers.
I’d have never thought of doing this. So pretty with all the beautiful flowers.