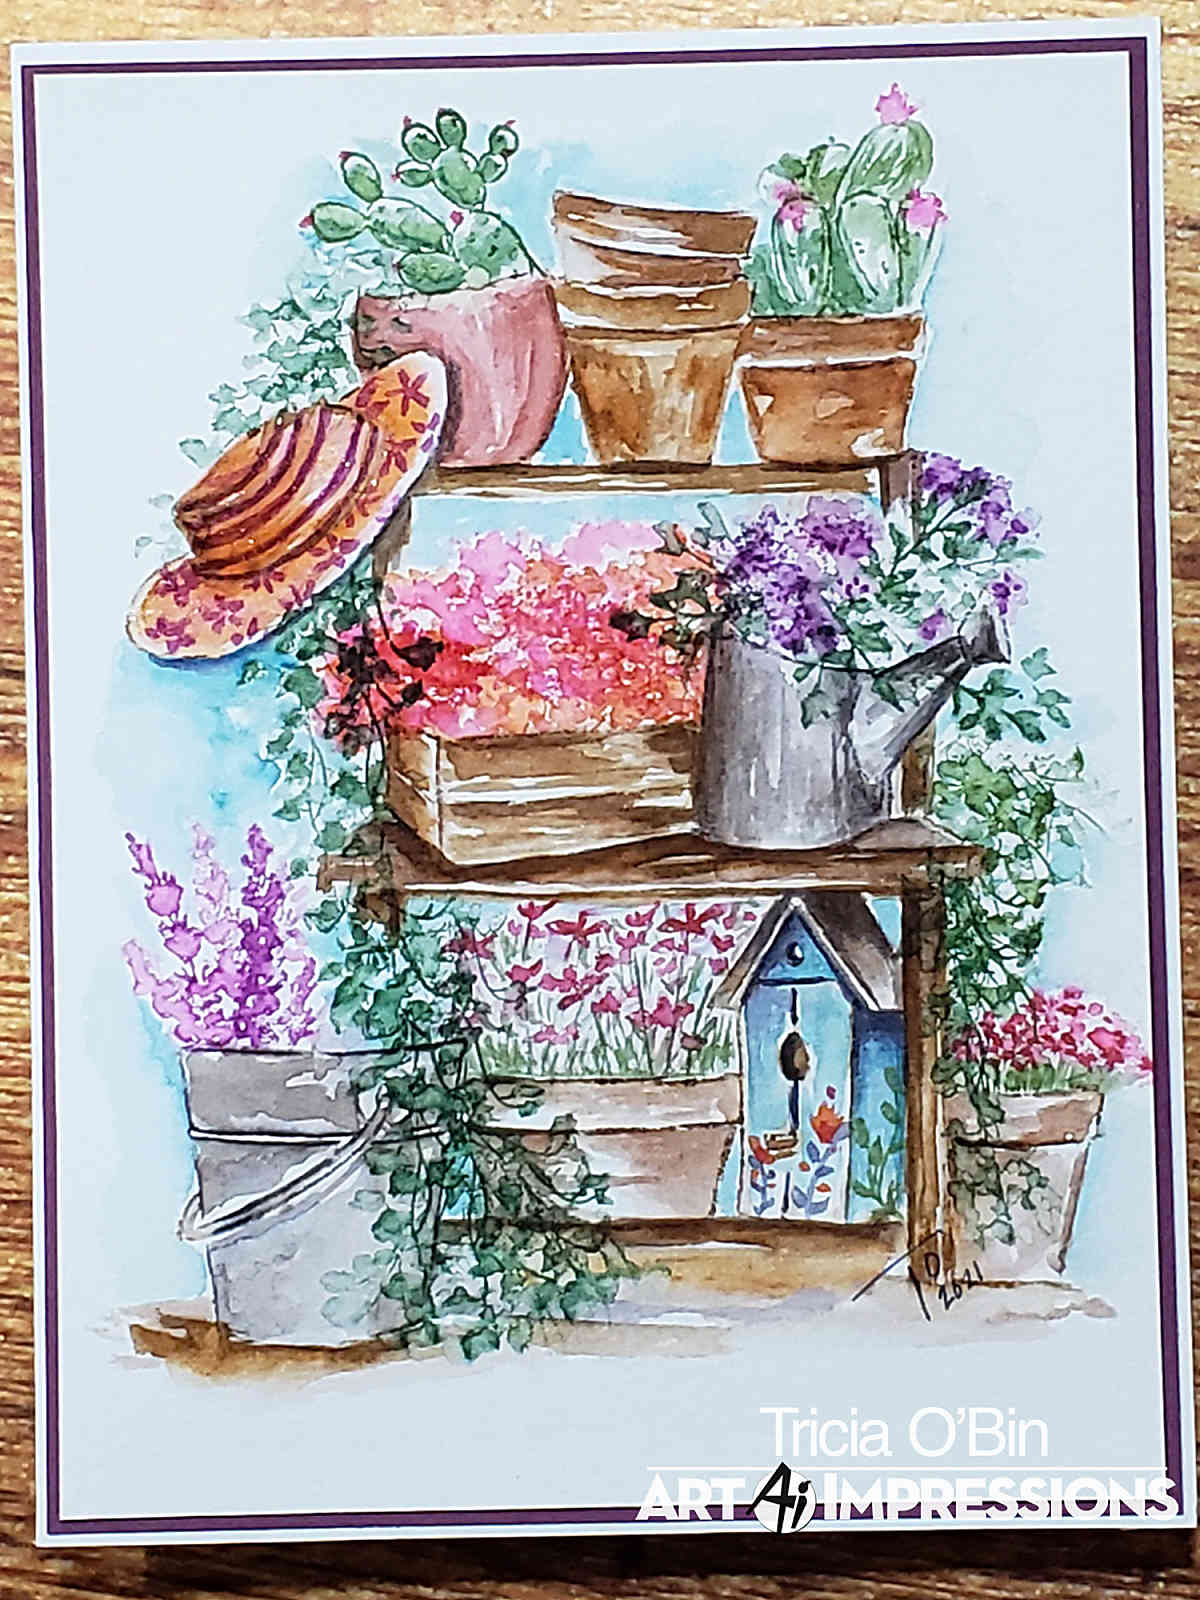
Hi Watercolor Fans, welcome back to watercolor weekend with Art Impressions Watercolor stamps. I am so thrilled to be able to join in the launch of the NEW watercolor stamps. Today’s project spotlights one of the new foundation stamps. I love everything about these as you have a scene already created for you and all you need to do is fill it with flowers and foliage, easy peasy. Come along with me and I’ll tell you how I created this Potting Bench.
The Painting
The potting bench and containers
To start off, I inked the entire background stamp up with 969. I also added some 569 (you could also use 565) to the pail and watering can. This is a big stamp so before I stamped it down, I huffed on the entire image. (Tip: the moisture in your breath will reactivate the ink on the stamp.) I stamped it into the middle of the watercolor paper.
As with all projects, I started out by pulling the color out of the lines towards the center of the potting bench and each of the containers, one at a time. Using my palette, I added additional color, making sure to concentrate the darker color where the shadows would be to create a more realistic look.
I added some pink to the container on the top left and blue to the bird house. To add a bit of interest, I painted a couple of flowers onto to the bird house.

The flowers and foliage
There are so many wonderful pots, I chose several flowers from a few different sets. You should use what you have, anything will work. There is really no rhyme or reason to what I chose I kinda just did one at a time.
I started with the long vine from the WC Foliage Set 3 inked with 249 (I am using 2 different greens to get a variety). To make sure I placed the vine where I wanted it, I used my stamp positioner and also masking tape to protect the areas I didn’t want to stamp. I added water to soften the leaves.
I also used the positioner to stamp the cacti into the top pots. Using the ink on my positioner, I added some additional color to the cacti, making sure to leave white space along the tops. Even though the stamp doesn’t have flowers, I painted in some pink flowers.
For the middle of the potting bench, I used the big puffy flower from the Watering Can set. I inked it first with 925 and stamped it several times around the box container. Then I reinked the stamp with 725 and stamped that several times on top of the orange. I added water, making sure to keep some white space, which created a really nice color mixture. I continued this process on the rest of the containers.
The hat and background
For the hat, I added some 925 starting from the darkest areas and pulling the color toward the brim. I left white space along the brim and lighter color to the front of the hat. Once that was dry, I continued to add additional color. For fun I added lines and painted in flowers.

I added a shadow below the potting bench and blue for a light background, this adds some additional dimension. Finally, the finishing touches, I used a marker to darken some of the areas I thought needed a little more color. By adding darker shadows it really makes your painting pop.
And last but not least, I signed and dated my work.
The Card
This is relatively simple as I really wanted the card to showcase the painting. I cut it down of 4x 5.25 and added it to a Gina K Plum Punch mat cut to 4.125 x 5.375 with connect glue. I added this to a base of Neenah Solar White cardstock.
Thank you so much for stopping by and I hope you enjoyed our projects spotlighting the new Watercolor Stamps release. We will have more for you so don’t forget to check back often. Tag us on Instagram so we can see your projects. Also use the hashtag #AIWatercolor so everyone can see your awesome projects. Have a crafty day!

RELATED: Art Impressions New Watercolor Release & Home Sweet Home Challenge


Love the scene you created with the new foundation stamp! I would love to know which set the hat comes from. It really adds a lovely touch to
the scene. Thx for all the info on what products you used! It really helps!
Pat