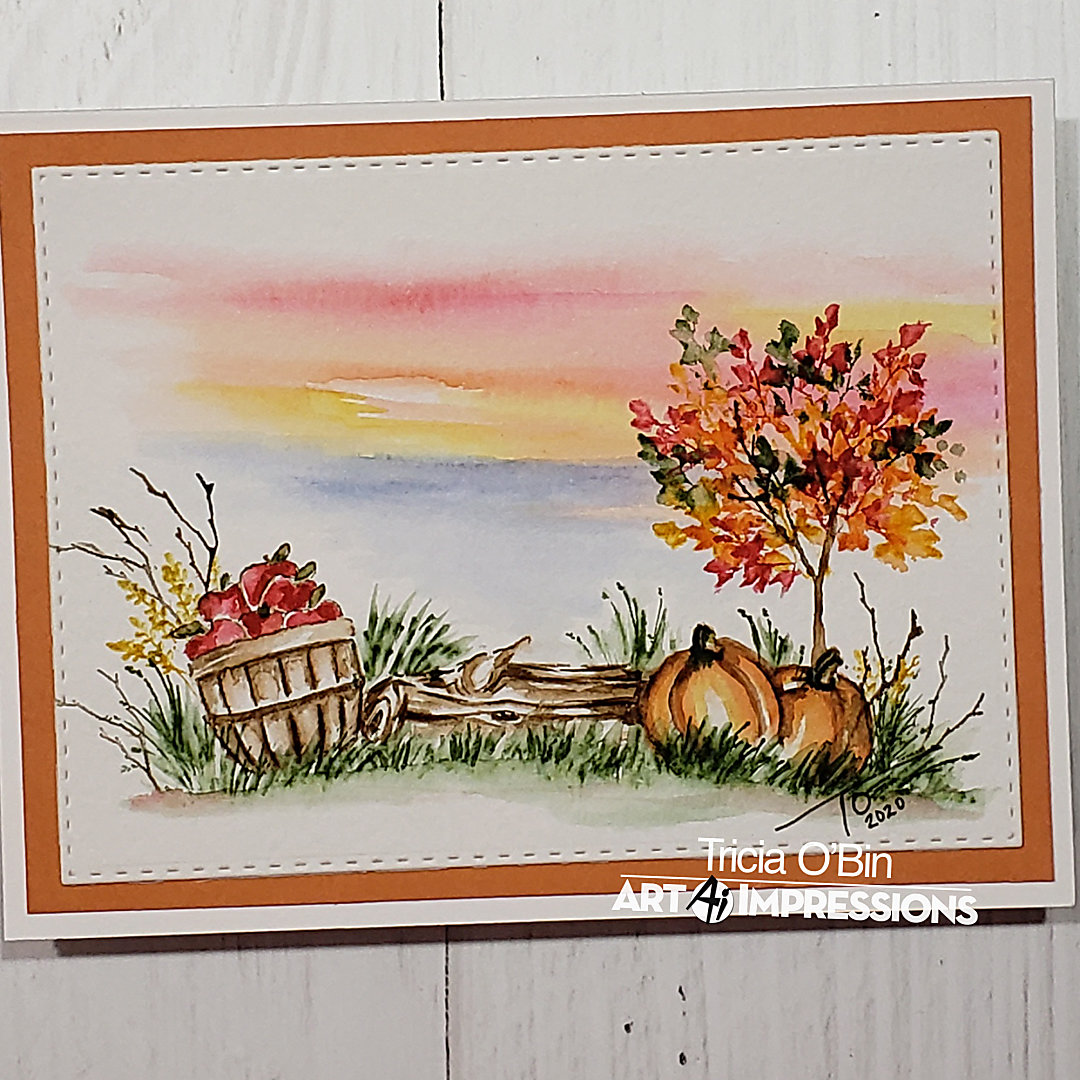
Hey watercolor fans, welcome to another Art Impressions watercolor weekend roundup! We have some fantastic inspiration for you. I decided to make a Fall in New England scene. I love this time of year and I am inspired by all the bright colors that we have right now in New England.
The Painting
I started out by inking up my pumpkins with brown and stamping them off. I left off the bottom of the pumpkins to leave room for the grasses. The first pumpkin was masked off before I stamped the second pumpkin next to it. It is important that you stamp the images that you want to be in the foreground first. To create a nice pumpkin color (in my opinion), I first pulled the brown color out of the lines leaving it concentrated in the shadowed areas. Next, I went over the brown and most of the pumpkin with yellow, making sure to leave a white highlight. Then I went over the brown and yellow with orange leaving some of the white and yellow showing in the highlighted areas.
Next, I inked the basket with brown, stamped it off, and stamped it to the left of the pumpkins. I took the log and placed it on my paper to line up where I wanted the basket. Using my water, I pulled the color from the lines making sure to stay within each area.
To protect the basket so I could stamp my apples into it, I masked it off. TIP: leave a small amount of the top of the basket exposed so you can place the apples into the basket. I inked up the apples in the brown, stamped them off and lined them up over the basket. Using my small brush, I pulled the color out of the lines. Once it was dry, I added some red to the apples. I used my fine time to create a darker highlight.
I replaced the mask over the pumpkin. To make sure I placed my log exactly where I wanted it, I used my positioner. I inked the log in brown, cleaned off the bottom of the log and stamped it between the pumpkins and apples. I pulled the color out of the lines keeping the shadows really dark, I also added some more brown from my palette.
Next, I added green to my large grasses and stamped it below all of my objects. I pulled the color up and out of the lines. To create some additional interest, I used my fine point to add some additional green in areas.
To create the sky, I added some orange, yellow, red and blue in the background. Once this was dry, I added one of the branches inked in brown behind the pumpkins. I used the vine inked in green, red, yellow and orange around the top of the tree to create my foliage.
For finishing touches, I inked up a small branch with brown and stamped it a few times on the left and right. I used one of the small leaves inked in yellow for some additional interest. Lastly, I signed and dated my painting.
Related: Fall Bridge | Watercolor Weekend | Art Impressions Stamps
The Card
I cut my painting out with the rectangle stitched die. Then I added it to a mat of Sweet Mango cardstock from Gina K Designs with Connect Glue. I added that to a base of Neenah card stock.
That’s it! I loved this project it was so quick and easy as most projects are with Art Impressions stamps. I hope you will give it a try, make sure to tag us on Instagram. Keep reading for more inspiration from my awesome team members!
For some more Fall inspiration check out this video!
Have a crafty day!


Such a beautiful scene! Love it and your sky is especially cool.
Gorgeous and love the fall colors, I am so glad fall is here in Alabama, loving it!
Love the fall colors and the sky is beautiful.