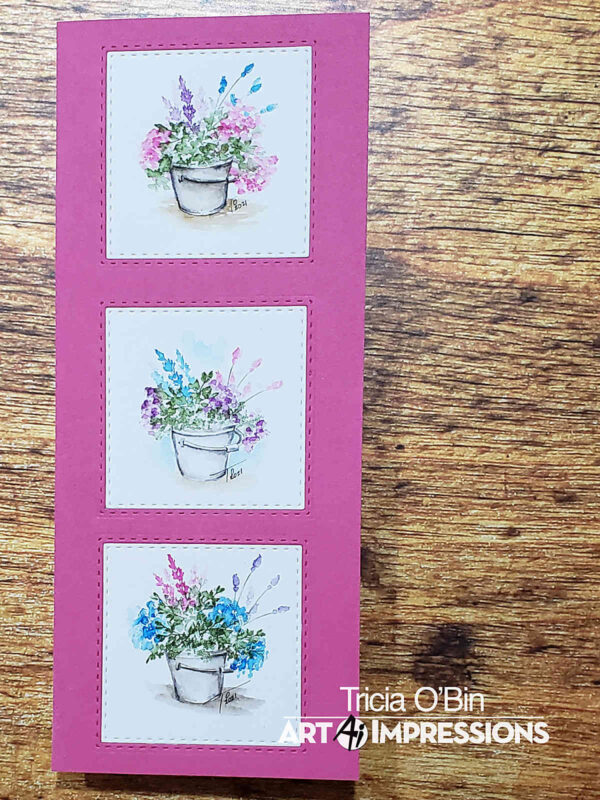
So our challenge this week was to create a quick and easy card. This one looks difficult but it was really easy. Sometimes I find myself creatively challenged when it comes to colors. Sometimes I do so many colors it overwhelms the painting. For this quick and easy project, I used only three colors for the flowers. In order to vary each flower arrangement, I used each color on different flowers. This worked out well with my three square layout. It created interest while maintaining an overall together look.

So, how do you re-create this layout, well I am here to tell you. I am only going to walk through one of the pots as the technique is the same for all the arrangements changing the flower colors each time.
The Painting
I inked the buckets with 969 and 569 to get a gray color. For a softer look, I stamped it off. I pulled the color out of the lines and added some additional color from my palette. I added a light brown shadow below the bucket. I repeated this for all of the buckets. Next, I moved onto the foliage.
When I approach a container, I like to first stamp in the foliage around the top of the container, then move onto the flowers and finally come back in with some additional foliage. I tend to be crazy with my foliage and lose places for my flowers to go so I find this works for me. So that being said, I inked my small vine (just the top of the stamp) and stamped it several times around the top of the container. I added water to soften them.
I then grabbed one of my flower colors (each flower set is going to be stamped with each color) and inked up the daisy bunch and added it to the left, right and off the left edge making sure to ink and then stamp in tight circles to create depth. I inked the top of the salvia stem with the next color and stamp it a few times on the left side leaving plenty of white space in the middle for some additional foliage. Soften your flowers with water. Stamp the foliage in between all of your blooms and dab. Finally, ink the rose buds with your next color and ink the stem with 177. Stamp them several times on the right side of the arrangement. I added water to the blooms only.
And as always the final touch is your signature and the date.
The Card
I cut each of the paintings with my square stitched die. I then lined up my card stock (cut to 8.5 x 3.5) with my ruler so I could sketch out where my cut squares were going to be. I ran each square through my Big Shot machine until I had 3 squares cut in my card stock layer.
Using the inlay technique, I glued this to my card base and then pieced each painting into each square. I really loved how this came out and how the stitched die really gave a lot of interest to the card itself. That’s it easy peasy.
Related: Umbrella Planter | Watercolor Weekend | Art Impressions
I hope you have enjoyed our quick and easy watercolor weekend and all the inspiration. I can’t wait to see what you have created! Tag me on Instagram and use the #AIWatercolor so we can see your creations. Have a crafty day!


When I try to get some item from your supply list, it goes to Linkdeli. I can’t get to the product to see if I want to buy it. It never used to be this way. Lots of people are using this Linkdeli and I can’t figure out how to get to the websites to order. Can you please help? Thank you.