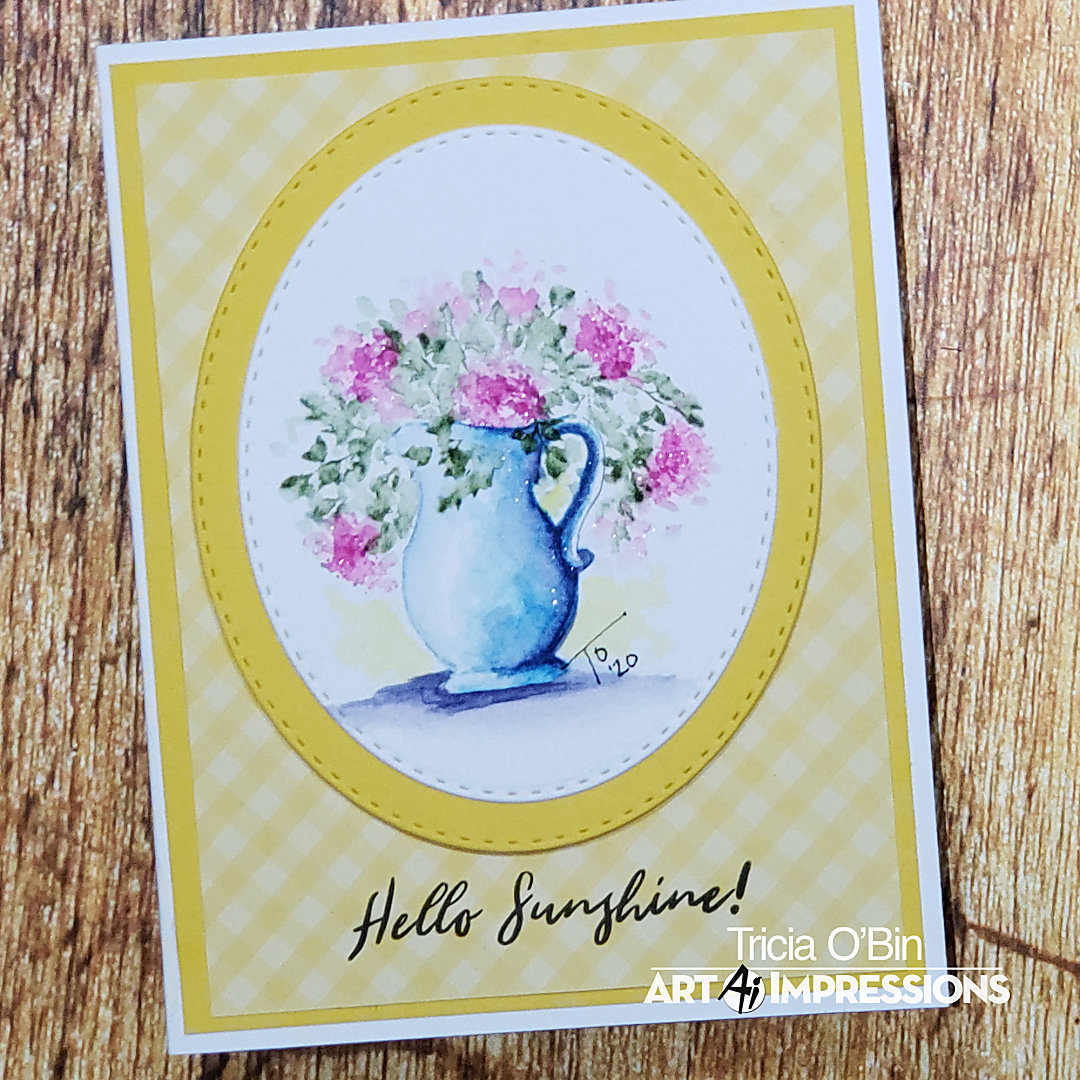
Welcome to watercolor weekend AI Fans! This weekend felt like spring so I thought I would do a quick little spring vase to bring a little color to my life. This project is so quick and easy and, like most of the projects I do, it is really versatile. Check out the Art Impressions blog for more inspiration.
Project Details:
First, I inked the vase from the Decorative Jar set in 565. I stamped it off so that it would be really light. I added water to the vase, and using my palette added some additional 565 to the left side and bottom of the vase to make it really dark. I added some 569 to the bottom of the vase to create a shadow and to anchor the vase.
Next, I inked the top of the vine, from the original foliage set, with 177 and stamped it along the top of the vase. I re-inked it and stamped it several times above the vase. I added water to the leaves to soften them. I did this first so that when I added water to the blooms they wouldn’t blend together (and make brown).
For the flowers, I used the dots from the mini flower set inked in 725 and stamped it several times in a circle inside the vase and around the foliage. I added water to all the blooms to soften them.
From my palette, I added some 055 to the right and left of the bottom of the vase to create a background which gives the vase depth. I signed and dated my project.
Card Details:
I cut my watercolor piece out with my oval stitched die. I also cut a mat out of Wild Dandelion with the next side up of the nested oval stitched dies. I cut it from the middle of a 4×5.25 piece of Wild Dandelion card stock that I attached to a Neenah card base with Connect Glue. I then attached a matching piece of patterned paper cut to 3.75×5. I attached the watercolor piece to the mat with Connect Glue and added some foam tape to the back of the mat and attached it to the card.
I placed the piece into my MISTI and stamped the Hello Sunshine sentiment from the WC Sentiments set using black Amalgam Ink.
Related: Watercolor Spring Door | Art Impressions
And that’s it…easy peasy. I love the versatility of all of the Art Impressions watercolor line. I hope you will give this project a try. We hope we inspired you to create something special this weekend.


So beautiful!
I love that bright yellow against your pretty vase & flowers – and just the touch of yellow on the background :o)